Tracking free space on the ZFS Drive

Now that I’ve set up 2 drives on a RAID like configuration using ZFS, I want to see how much space I have left on the drive.

Because I’m using ZFS, it is not recognised as a standard drive in Ubuntu and as such it’s not possible to use standard Ubuntu utilities to keep track of disk usage.

You can use the following command to check the status of your ZFS pool:

sudo zpool list

However this is somewhat a manual action which requires opening a terminal. Since I use DomotiGa extensively, I wanted to display the free space on the ZFS device (already displayed thanks to the HDDTemp plugin).

I ended up with this python script:

#!/usr/bin/python
# -*- coding: utf-8 -*-

import requests, subprocess
import json, json as simplejson

def Domotiga_API(Method, Device_Id, Valuenum, Value):
url = "http://localhost:9090" 
data={'jsonrpc': '2.0', 'method': '' + Method + '', 'params': {'device_id': Device_Id, 'valuenum': '' + str(Valuenum) + '', 'value': '' + str(Value) + ''}, 'id': 1}
headers = {'Content-type': 'application/json', 'Accept-Encoding': 'text/plain', 'Accept': 'text/plain'}
r = requests.post(url, data=json.dumps(data), headers=headers)
c = r.content
result = simplejson.loads(c)
#print result

p = subprocess.check_output(['sudo', '-S', 'zpool', 'list', '-o', 'alloc'], shell=False)
q = subprocess.check_output(['sudo', '-S', 'zpool', 'list', '-o', 'size'], shell=False)
c = subprocess.check_output(['sudo', '-S', 'zpool', 'list', '-o', 'cap'], shell=False)
mystring= p[6:11] + "/" + q[6:11]
Domotiga_API("device.set", 65, 2, mystring.strip())
Domotiga_API("device.set", 66, 2, mystring.strip())
Domotiga_API("device.set", 65, 3, c[6:10].strip())
Domotiga_API("device.set", 66, 3, c[6:10].strip())

I then set up an even in DomotiGa which launches bash script every 5 min:

echo "password" | sudo -S ~/domotiga/shell/zfschecker.py

Replace password with your own sudo password of course.

Tada:

ZFS Disk Space

ZFS Disk Space


Calendar Widget with SmartVISU is back!

On 17th November 2014, Google closed its V1 and V2 APIs:

The Google Calendar API moved to version 3 months ago; however, many developers have continued to hang on to v1 and v2 integrations. In less than a month, on Nov. 17, Google will shut down v1 and v2 in accordance with itsDeprecation Policy. Google has published an entire Migration Guide to assist developers’ transition, and many third-party solution providers have released packages to further streamline the process.
This meant that the Calendar widget on SmartVISU was no longer working.
CarGo kindly created a guide on how to create a V3 API so the calendar would work with SmartVISU.
Trouble is, CarGo wrote it in German, so I’ve translated it below. It may sound complicated, but then it’s only required once 🙂

  1. Log in to the Google Developer console: https://console.developers.google.com
  2. Create a “Project” -> You can simply enter “Project API”, unless you’re planning on creating many APIs / Apps, it does not matter at this stage
  3. On the left menu, select “APIs” then “Calendar API” on the main page.
  4. On the left menu, select “Credentials” then click on  “Create new Client ID”
  5. Important: Select “Installed applications”, NOT Web Application – otherwise you’ll have to grant access each time in a pop-up…
  6. On the left menu, select “Consent screen”. The main info to provide here is the Product Name. I called mine SmartVISU.
  7. Select “Installed Application” then “Other” for application type, and finally “Create Client ID” .
  8. Now under “Credentials” from the left menu, “Client ID”, “Client Secret” and “Redirect URIs” are displayed. We’ll need these in the next steps

The access details are now configured. The trick is to create an “Authorization Code” and “Refresh token”.

To do so, download Google_Calendar_SmartVISU.zip and extract it in “[path]/smartvisu/lib/calendar/service”.  (Replace [path] with the path to access your SmartVISU folder)

Make sure the file owner is www-data else you’ll get errors. To make www-data the owner, simply enter the below in a terminal:

chown www-data [path]/smartvisu/lib/calendar/service/google*
  1. Getting the “Authorization Code” and “Refresh token”:
    1. Enter the values ​​for “ClientID” and “redirect URI” in “google_1.php”
    2. Paste the below command in the terminal
    3. php -q google_1.php
    4. Click on the link in the terminal (you may need to hold CTRL while you click)
    5. Confirm you want to grant access to your Google Account
    6. Copy the “Authorisation Code” displayed
    7. Enter the values ​​for “ClientID”, “Client Secret”, “redirect URI” and the code copied from above step in “google_2.php”
    8. Paste the below command in the terminal
    9. php -q google_2.php
    10. Keep note of the provided “Refresh Token”.
    11. Edit “googleV3.php” and replace the blanks for:
      1. “ClientID”
      2. “Client Secret”
      3. “Redirect URI”
      4. “Refresh Token”

Last but not least, edit config.php in your main SmartVISU folder and add replace your google calendar line with the new script:

define('config_calendar_service', 'googleV3');


Save,  Et Voilà !

Massive thanks to CarGo for the original work and guide.

Google Calendar Widget V3 API

Google Calendar Widget V3 API

PS. There may be a need to refresh the token in the future. I’ll post an update as and when it occurs. If this happens, Ideally the refresh should be automated, but that’s a story for another time 😉


ZFS as RAID1

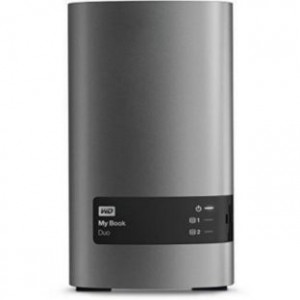
As my HP N54L server has 4 hard drive bays, I’ve been waiting for a good deal to add hard drives and expand my storage. Following a special offer at Argos (£99 instead of £249 😎 ), I purchased a WD 4TB My Book Duo Desktop USB Hard Disk Drive:

WD 4TB My Book Duo

WD 4TB My Book Duo

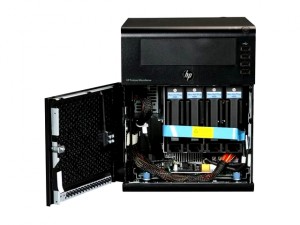
The idea was to take the hard drives out of the box and fit them in the server:

HP N54L Bays

HP N54L Bays

I originally wanted to set them in RAID1 (mirrored) for additional data protection, it turns out that the RAID1 feature on the Bios is not compatible with Ubuntu.

I therefore decided to use ZFS which although a bit slower, would actually be more powerful than RAID1 due to its self healing functionality.

This is what I did to set it up:

sudo add-apt-repository ppa:zfs-native/stable
sudo apt-get update
sudo apt-get install ubuntu-zfs

It is better to set it up by using the hard drive ID rather than name. the below command will give you what you need

ls -l /dev/disk/by-id

Once I have the names of the drives, I uses the  below command to create the zfs pool. (Don’t start copying files into it yet until ZFS file systems are created:

sudo zpool create -o autoexpand=on myzfs mirror /dev/disk/by-id/disk1 /dev/disk/by-id/disk2


I then created a separate file system for each of my top-level folders:

sudo zfs create -o compression=on myzfs/folder1

I created “Backup”, “Movies”, “Music”, “TV_Shows”, “Pictures”. They show up in Ubuntu’s file system as /myzfs/Backup, /myzfs/Movies, /myzfs/Music, /myzfs/TV_Shows, etc.

I’ve chosen the latter folder names as I’ll be using them for Plex

Thanks to whirlpool.net.au for the instructions on how to set up ZFS.


SmartVISU Plot Charts

With the release of DomotiGa v1.0.020, it is now possible to use SmartVISU plot charts directly instead of importing a 3rd party tool like HighCharts (see previous article about HighCharts).

Notes:

  1. Make sure you use the correct DomotiGa drivers for SmartVISU (you can get them here: io_domotiga.js and io_domotiga.min.js)
  2. If not yet done, you’ll also need to ensure you are tracking the value changes by enabling Log value history to database under the Options tab
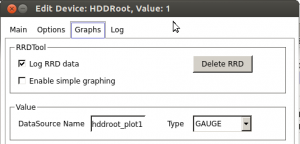
  3. Name your device values correctly: the device name ideally has no spaces, the datasource name will be made of devicename_plotx where x is the device’s value (1 to 4). In my example, HDDRoot is the name, the Hard Drive’s temperature is in value1 so the datasource name is hddroot_plot1:

    datasource name

    datasource name

  4. Use this command in your SmartVISU page:
  5. {{ plot.period('plot1', 'HDDRoot_Plot1', 'avg', '1w', '', '', '', '', 'HDD Root', '#ff0', 'line', ['','°C'], '1h')}}
  6. Explanation of what each parameter means is provided by SmartVISU HERE

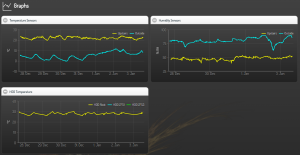
The result of my setup is this:

SmartVISU Plots

SmartVISU Plots

Note: I just added 2 hard drives to my server for storage and backup purposes (see this article), so there has not been enough time yet to track their temperature changes in the above charts.


Humble Pi – Post Setup Review

So it’s been nearly a month since I replaced the breadboard with a Humble Pi (see this post), and everything seems better with it.

The LCD would scramble up every so often, requiring a power down cycle of the LCD and restart of the driver routine, whenever a “sharp” noise would happen close to the breadboard, the LCD would dim down for a sec, some sensors would not always update on time.

All of these are now a thing of the past. The LCD is actually brighter (even thought still powered by +3.3V when designed for +5V), hasn’t bugged a single time, is completely unaffected by noise or otherwise. Really happy with it all. Would recommend this to anyone who’s past the breadboard design test stage and ready to make things a bit more definitive (although it’s still fairly easy to de-solder a component).

Anyway, a year ends on a high note, let’s see what 2015 will bring us. Happy new year to all my readers 🙂


Humble Pi

I’ve been using a breadboard on top of my Raspberry Pi for a while now to connect components to the GPIO ports.

Pros:

  • Easy to test
  • Easy to make changes
  • Easy to reset individual components by removing their power supply
  • Not “set in stone”

Cons:

  • Fragile, jump cables can be easily disconnected
  • Not secure, cables, resistors and other components could be pushed against each other, creating short-circuits
  • Not aesthetically pleasing

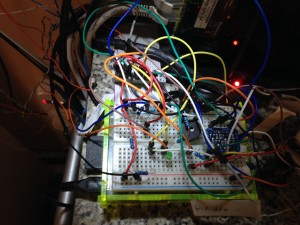
The not aesthetically pleasing is probably best described by a picture:

Breadboard On Pi

Breadboard On Pi

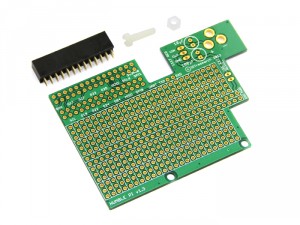
I’ve decided it was time for me to become confident and stop the try and error approach. I’ve not changed the setup / layout in months now and use many components integrally as part of my home automation system like PIRs to control lighing. I’ve therefore purchased a Humble Pi from HobbyTronics to make everything a little bit less like work in progress in the lab:

Humble Pi Stage 1

Humble Pi Stage 1

the board came as a kit with all parts separated. I’ve already soldered the header socket and made minor, direct connections to some of the GPIO pins in preparation to the upcoming components:

Humble Pi Stage 2

Humble Pi Stage 2

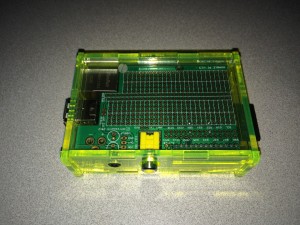
And I’ve checked that it fits in the case. Actually looks pretty cool. Will have to decide how to get the wires to get through though

Humble Pi Stage 3

Humble Pi Stage 3

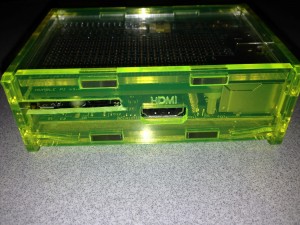
The other thing I’d like to do is to ensure I can keep the drop cover on to protect the Pi against accidental damages, but I still need all my sensor wires to get in. I’ve therefore sawn a slot off to allow for this:

Pi Case with additional slot

Pi Case with additional slot

Now I need to complete the soldering of all the components. I’ll post a picture when I’ve finished.

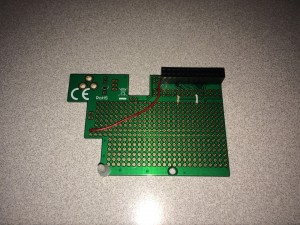
[3rd December 2014]

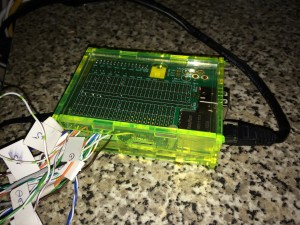
I’ve finally done it! No more messy breadboard, it’s all nice and tidy now 🙂

Humble Pi Completed

Humble Pi Completed


Smart(er) Dehumidifier

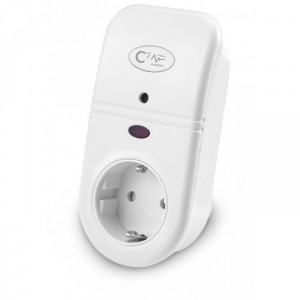
So my dehumidifier is already somewhat smart: by using a Cresta TS34C Wireless Temperature & Humidity Sensor, and a HomeEasy Remote Controlled Socket, I can automatically switch the dehumidifier on when the humidity is too high.

Trouble is I’m getting lazy and simply rely on this automation and as a result I tend to forget that the dehumidifier tank will eventually fill up and then stop.

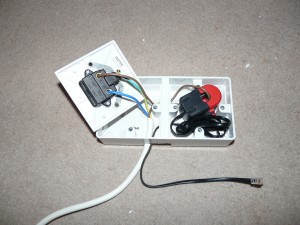
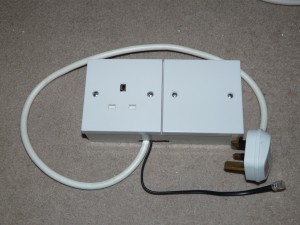
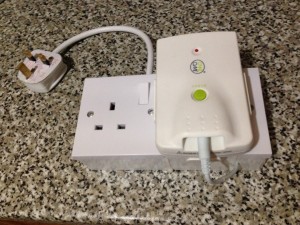
So taking it a step further, I’ve added a home-made Individual Appliance Monitor (IAM) with a spare Current Cost sensor which I plugged between the HomeEasy socket and the dehumidifier.  Check this post for how to make the sensor (same principle as for the Owl one).

Now with a simple event in DomotiGa, if the HomeEasy Socket is on but the power consumption is 0, it means the tank is full and an email is automatically sent.

Isn’t automated life beautiful? 🙂


Ubuntu 14.01 LTS (Trusty Tahr)

After months of clicking the “remind me later” button when prompted to upgrade, I finally too the plunge.
And as I feared, things went wrong 🙁

  • Once the upgrade complete, I was greeted with a grey screen when opening VNC (I do everything “headless”)
    • Even with changes to the vnc startup file, I’d end up with no unity launcher and no task bar
  • The keyboard was messed up:
    • Impossible to type ‘s’
    • Typing ‘d’ minimised everything
    • ‘up’ maximized the window (no access to previous command in the terminal)
  • Apache was not working anymore

Needless to say I was not a happy bunny.

After hours of “googling” (I know there’s no such word), endless changes to vnc config, dconf, and reboot, I finally managed to fix everything:

  • The fix for the grey screen / lack of unity launcher / lack of task bar was settled by changing my ~/.vnc/xstartup with the below:
    • #!/bin/sh
      
      def
      export XKL_XMODMAP_DISABLE=1
      unset SESSION_MANAGER
      unset DBUS_SESSION_BUS_ADDRESS
      
      vncconfig -iconic &
      x-window-manager &
      gnome-panel &
      gnome-settings-daemon &
      metacity &
      nautilus -n &
      gnome-terminal &
      gnome-session -session=ubuntu &
    • This didn’t fully resolve the issue as the look and feel is the old, pre-unity desktop, with top and bottom bars, no side launcher. But at least I can work with that for now.
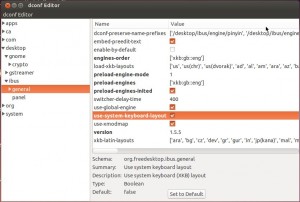
  • I fixed the keyboard layout with the dconf tool:
    • If not yet installed, type
      sudo apt-get install dconf-tools
    • Then type
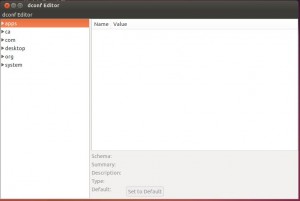
      dconf-editor

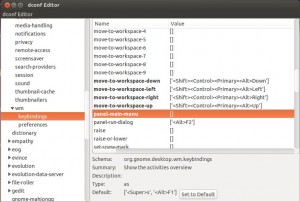
      and you should get this:

    • dconf-01Go to desktop > ibus > general and tick the box “use-system-keyboard-layout“:
    • dconf-02Then go to org > gnome > desktop > vm > keybindings and replace any entry with the work “super” with “[]”:
  • dconf-03Websites have a new path under Apache. Whereas it used to be under /var/www/, the default path is now /var/www/html/.
      • Of course as I upgraded, I decided to keep my settings, which pretty much rendered everything useless.
      • I ended up completely removing Apache and reinstalling it with these commands:
      • sudo apt-get update
        sudo apt-get purge apache2
        sudo apt-get install apache2
      • All I had left to do was to more the content of /var/www/ to /var/www/html/

Everything is now working again 🙂


OWL Individual Appliance Monitor

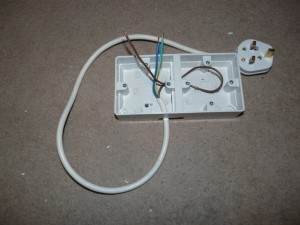
With a cheap OWL CM119 Energy Monitor, and thanks to an idea picked from pictures found on Flickr, I built my own appliance monitor:

OWL CM119

OWL CM119

Pictures from Flickr showing steps to create the monitor:

OWL_IAM_1 OWL_IAM_2 OWL_IAM_3

And this is what I ended up with:OWL_IAM_4

And with the benefit of communication via 433MHz and being supported by the RFXTrx433, I don’t even need to use the OWL base, I just needed to enable the Oregon Mode in DomotiGa to start receiving the data. (See RFXTrx433 post for instructions).

Very handy to automate tasks based on the status of an appliance…

So in DomotiGa, this is what I did to automate based on power consumption under Events:

  1. Trigger:
    1. Trigger Type: Device Lastseen
  2. Conditions:
      1. CInt(Dev_50_Value2) >20 (this is to cater for devices in standby mode, create another condition with <20 for the Off State. value may need to be amended)
  3. Events:
      1. Use the trigger and condition created above, and add your actions


Current Cost’s IAM

Having moved one of my PIR‘s in the living room to automate the lights in here too, I quickly realised there was a major flaw: when I watch the TV, I tend to move very little. This results in the lights turning off when I want them to stay on.

I had to find a better solution than waving my arms every 5 min or so to keep the lights on.

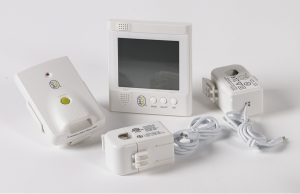
I found out Current Cost do IAMs or Individual Appliance Monitors. They look like this (I ended up with a European version with a couple of adapters to get it to work here in the UK):

Current Cost IAM

Current Cost IAM

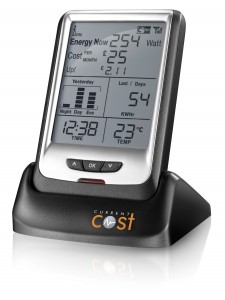
Since my Current Cost Classic monitor did not support this, I bought a 2nd hand one that does from eBay: the EnviR:

Current Cost EnviR

Current Cost EnviR

The neat result is that the IAM, although not natively supported by DomotiGa (at the time of writing), is actually correctly detected since Current Cost use the same format on the serial port 🙂

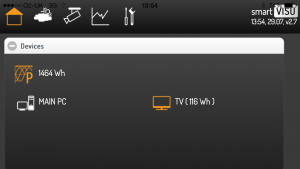
It was then very simple to add an event in DomotiGa to check IF there is no motion detected on the PIR AND the power consumption of the TV is less than 20 watts (the TV uses about 12-14watts in standby), THEN I switch the light off.

SmartVISU - TV Monitor

SmartVISU – TV Monitor (screenshot from mobile interface)

For the record, the Current Cost returns a string, not a number, in the format ‘00000‘, so in DomotiGa I had to convert this to a number for my IF statement:

CInt(devicename_value2) < 20