Category Archives: Misc

Nest Thermostat

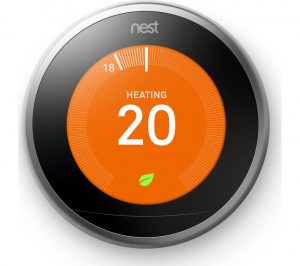
My old “dumb” thermostat packed up while doing some redecorating, so I upgraded to a smart one: the Nest Thermostat:

Nest Thermostat 3rd Gen

Nest Thermostat 3rd Gen

One of the cool features of this thermostat is that it can be remotely controlled via the web (http://home.nest.com) or via an app on a smart phone.

Now what would be even better is if I could integrate this with the rest of my home automation setup. And so I went looking online for ways to connect with the intent of 1) extracting data such as temperature and humidity and 2) control the target temperature remotely from DomotiGa.

My first connection attempt was via gboudreau’s unofficial API on GitHub

Although it works perfectly fine, there is some sort of limit on the number of times you can poll the info and eventually the connection gets closed.

I then looked at Google’s official API, and I’ve even followed their tutorial and managed to connect to my Nest, but it’s a little bit too much out of my area of expertise, plus I think the Google codelabs example is intended to be ran on mobile devices rather than a simple web interface. So for now I’ve parked this project for later.

[26th Jan 2017]

Edit: home-assistant.io supports Nest natively, using Google Nest official API. I’m currently working through integrating my Nest with home-assistant.io and get it to talk to DomotiGa. Watch this space.


LCD 3D Printed Custom Case

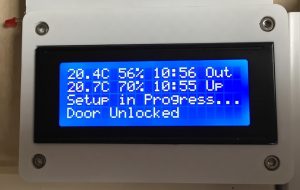
I’ve had my LCD Display screwed against a badly made piece of wood just so I could attach it to the wall.

After looking for a case for the display, I stumbled upon Thingiverse where “mmontee” had already done all the hard work. I headed over to 3DHubs and found a printer who did the job for me quickly and at a reasonable price.

I opted for a white case as I thought the display would stand out even more.

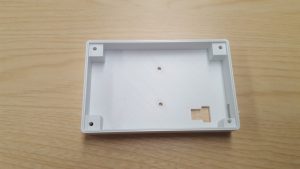
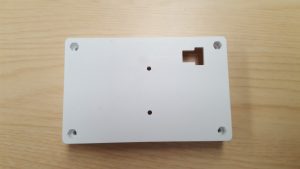
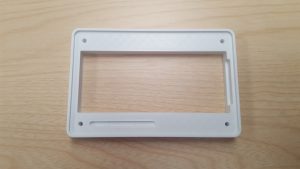
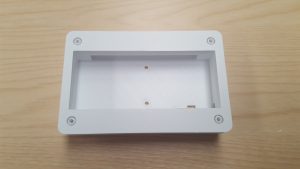
The printed case looks like this:

LCD Case Back Inside

LCD Case Back Inside

LCD Case Back Outside

LCD Case Back Outside

LCD Case Front Inside

LCD Case Front Inside

LCD Case Assembled

LCD Case Assembled

Case with LCD Fitted

Case with LCD Fitted


Google TTS is dead. Long Live Voice RSS

Google changed once again the way their translate_TTS service works 🙁

Having trawled the interweb for an answer, having even signed up for an API key on the new Google Translate API V2, it’s just become impossible to download the text-to-speech audio files.

I have tried various free TTS options – see previous post here – and none were really “fit for purpose” as they really sounded metallic computerised voices, but I’ve just found Voice RSS.

Now Voice RSS is really nowhere as good as Google’s TTS quality, but in the grand scheme of things, it’s probably the next best thing, especially as it can be used almost as a direct replacement using wget.

You’ll have to sign up for an API key first, but provided you need less than 350 requests / day (with each request being smaller than 100kb), it’s free 🙂

The command goes as follows:

http://api.voicerss.org/?key=[your API Key]&hl-en-gb&r=1&f=48khz_16bit_stereo&src=hello+world

It’s also a bit slower than Google to return the audio files so I’ll probably review my commands to do the complete download and play them all one after the other.


LightwaveRF Socket Kit

Until now I was using HomeEasy HE830s Remote Controlled Sockets, but they appear to have developed a fault where they will turn themselves on randomly and get locked so become somewhat useless.

While I try and I claim warranty on them, I also need a few more sockets to help with Holiday lighting when I’m away as well as Christmas lighting automation.

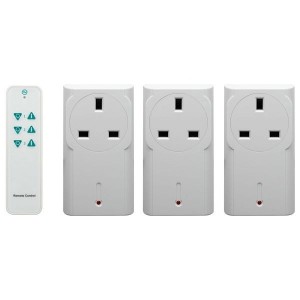
So I purchased a set of LightwaveRF JSJSLW381 Remote On/Off Socket Kit to help with this:

LightwaveRF JSJSLW381 Remote On/Off Socket Kit

LightwaveRF JSJSLW381 Remote On/Off Socket Kit

Plus it gives me another remote to control my events in DomotiGa 🙂

They are easy enough to pair/connect to: simply plug them and they enter into pairing mode. Then send an ON command from the remote or DomotiGa and you’re set.

Note: I’m not planning on actually controlling the sockets with the remote but from my DomotiGa server, though I could do both if I wanted: the LightwaveRF JSJSLW381 Remote On/Off Sockets can be paired with up to 3 devices/remotes (vs 6 for other LightWaveRF devices..). Instead I will use the remote to trigger events in DomotiGa so I don’t need to access my PC or my Phone (although the latest integration with Siri is proving quite useful)


Controlling my home with Siri

With all this automation taking place, I’m getting lazier by the day. Even having to unlock my phone and open the bookmark for SmartVISU to activate a mood scene it taking too long / requiring too many actions.

Since Apple added HomeKit with its iOS 8, there’s now a way to integrate this with DomotiGa so I can control my devices with Siri! Yes voice control is finally here 😎

This is how it’s done. Note: this assumes you have DomotiGa already set up and running and know your way around Linux.

Installation

Installing on a Raspberry Pi? do this first:

sudo apt-get update && sudo apt-get upgrade
sudo apt-get install libkrb5-dev

You’ll also need the Avahi package:

sudo apt-get install libavahi-compat-libdnssd-dev

Homebridge is published through NPM, if npm isn’t yet installed on your system, do this first:

sudo apt-get install curl
curl -sL https://deb.nodesource.com/setup_0.12 | sudo bash -
sudo apt-get install -y nodejs

Then install HomeBridge “globally” by typing:

sudo npm install -g homebridge

Then install the DomotiGa plugin (Thanks Samfox2):

sudo npm install -g homebridge-domotiga

Now that HomeBridge and DomotiGa plugins are installed you need to add your own config file. Create a file called config.
NOTE: Your config.json file MUST live in your home directory inside .homebridge.
You can start by copying / pasting the below sample and update to reflect your setup:

{
"bridge": {
"name": "DomotiGa",
"username": "CC:22:3D:E3:CE:32",
"port": 51826,
"pin": "031-45-154" 
},

"description": "This is an example configuration file with one fake accessory and one fake platform. You can use this as a template for creating your own configuration file containing devices you actually own.",

"accessories": [
{
"accessory": "Domotiga",
"name": "Sensor garden",
"host": "localhost",
"port": "9090",
"service": "TempHygroMeter",
"device": "81",
"valueTemperature": "1",
"valueHumidity": "2",
"valueBattery": "4",
"lowbattery": "3000" 
},
{
"accessory": "Domotiga",
"name": "PC",
"host": "192.168.0.xxx",
"port": "9090",
"service": "Contact",
"device": "77",
"valueContact": "1",
"valueBattery": "2",
"lowbattery": "3000" 
},
{
"accessory": "Domotiga",
"name": "Printer",
"host": "192.168.0.xxx",
"port": "9090",
"service": "Switch",
"device": "79",
"valueSwitch": "1" 
} 
]
}


To run HomeBridge, type:

`homebridge`

You may get warning messages as per below. These can be ignored. You should however not get any error message:
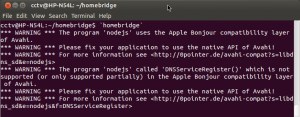
Homebridge Warnings

Homebridge Warnings

iOS App

Now you need an app on your iOS device. You can use Eve By Elgato Systems
https://itunes.apple.com/gb/app/elgato-eve/id917695792

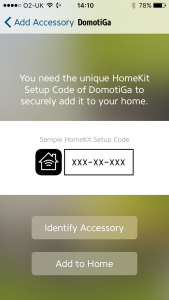
In Eve, simply add an accessory:
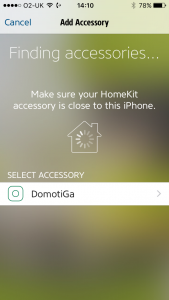
Eve - Add Accessory

Eve – Add Accessory

(You’ll probably be asked to create a home the first time, call it anything you want, like “Home”.)

Tap on “Identify Accessory”:
Eve - Identify Accessory

Eve – Identify Accessory

Enter the code as per your config.json file, in this example: 031-45-154

You’re set up !

Hold your home button and ask Siri all kinds of stuff. On of my favourites is “Set Mood Scene Movies on” which sets my lighting accordingly 🙂

Troubleshooting

If you cannot see your accessories (DomotiGa device), try the following steps:

  1. Stop HomeBridge
  2. Delete the “Persist” folder in your home directory inside .homebridge.
  3. Try and change the username in your config.json file (anything else)
  4. On your iOS device, go to Settings > HomeKit and delete your Home
  5. Close Eve (double press the home button and swipe Eve up)
  6. Restart HomeBridge
  7. Restart Eve

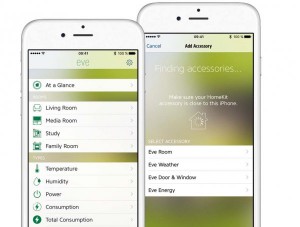
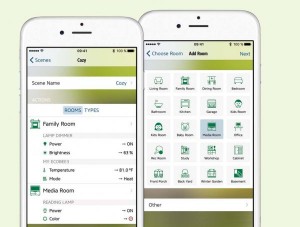
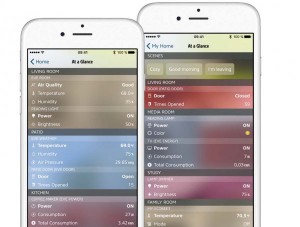
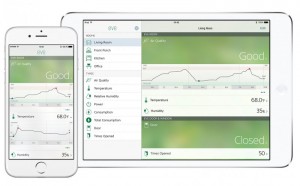
Here are a few screenshots from Elgato’s website on what Eve can do:
eve-landing-ipadiphone_2 eve-app-screen-simple eve-app-screen-fingertip_1 eve-app-screen-glance


Google Text-To-Speech

[8th Feb 2016] Note: this article is now obsolete, please check my newer article on Voice RSS


For some time I was using Google’s free Text-To-Speech  which provides a very simple way of converting text into speech:

http://translate.google.com/translate_tts?tl=en&q=Hello+world!

This enabled me to be greeted each morning with the weather forecast for the day.

However early August Google changed their website and forced users to enter a captcha to stop automated access, with the message “Our systems have detected unusual traffic from your computer network. This page checks to see if it’s really you sending the requests, and not a robot.“.

Seeing as I was using this in bash / python scripts, TTS would no longer work.

While looking for alternative (free) solutions, I tried various TTS solutions including epeak, festival, pico2wave, and Mbrola voices, but it was far off the quality provided by Google’s TTS engine.

Anyhow, not giving up, and after a lot of digging, I found the solution, I just had to add more parameters to Google URL. I’ve added the new link below with the new parameter in bold below. Also note the revised parameter for the translated language:

http://translate.google.com/translate_tts?ie=UTF-8&tl=en_GB&total=1&idx=0&client=t&q=Hello+world!

Now to call this from a bash script, use the below commands:

wget -q -U "Mozilla/5.0" -O output.mp3 "http://translate.google.com/translate_tts?ie=UTF-8&tl=en_GB&total=1&idx=0&client=t&q=Hello+World!"
mpg123 -q output.mp3

Notes:

  • Google will not accept access unless it thinks it’s a browser, to we have to use wget to output the sound into an mp3 using the -U “Mozilla/5.0” command.
  • Google has a limit of 100 characters per request

Now all I have to do in DomotiGa is to create an event triggered on a movement sensor with a condition based on hour of the day (typically 04:00 – 12:00), ensuring it will only run once in a set period (8h). This way, as soon as I enter the living room in the morning, I get greeted with the weather forecast for the day 😎
I use a free wunderground account to extract weather data from an xml file and achieve the above.


ZFS as RAID1

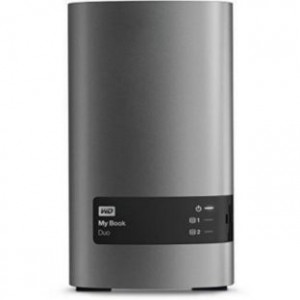
As my HP N54L server has 4 hard drive bays, I’ve been waiting for a good deal to add hard drives and expand my storage. Following a special offer at Argos (£99 instead of £249 😎 ), I purchased a WD 4TB My Book Duo Desktop USB Hard Disk Drive:

WD 4TB My Book Duo

WD 4TB My Book Duo

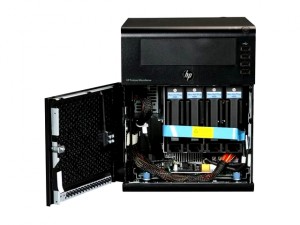
The idea was to take the hard drives out of the box and fit them in the server:

HP N54L Bays

HP N54L Bays

I originally wanted to set them in RAID1 (mirrored) for additional data protection, it turns out that the RAID1 feature on the Bios is not compatible with Ubuntu.

I therefore decided to use ZFS which although a bit slower, would actually be more powerful than RAID1 due to its self healing functionality.

This is what I did to set it up:

sudo add-apt-repository ppa:zfs-native/stable
sudo apt-get update
sudo apt-get install ubuntu-zfs

It is better to set it up by using the hard drive ID rather than name. the below command will give you what you need

ls -l /dev/disk/by-id

Once I have the names of the drives, I uses the  below command to create the zfs pool. (Don’t start copying files into it yet until ZFS file systems are created:

sudo zpool create -o autoexpand=on myzfs mirror /dev/disk/by-id/disk1 /dev/disk/by-id/disk2


I then created a separate file system for each of my top-level folders:

sudo zfs create -o compression=on myzfs/folder1

I created “Backup”, “Movies”, “Music”, “TV_Shows”, “Pictures”. They show up in Ubuntu’s file system as /myzfs/Backup, /myzfs/Movies, /myzfs/Music, /myzfs/TV_Shows, etc.

I’ve chosen the latter folder names as I’ll be using them for Plex

Thanks to whirlpool.net.au for the instructions on how to set up ZFS.


Humble Pi – Post Setup Review

So it’s been nearly a month since I replaced the breadboard with a Humble Pi (see this post), and everything seems better with it.

The LCD would scramble up every so often, requiring a power down cycle of the LCD and restart of the driver routine, whenever a “sharp” noise would happen close to the breadboard, the LCD would dim down for a sec, some sensors would not always update on time.

All of these are now a thing of the past. The LCD is actually brighter (even thought still powered by +3.3V when designed for +5V), hasn’t bugged a single time, is completely unaffected by noise or otherwise. Really happy with it all. Would recommend this to anyone who’s past the breadboard design test stage and ready to make things a bit more definitive (although it’s still fairly easy to de-solder a component).

Anyway, a year ends on a high note, let’s see what 2015 will bring us. Happy new year to all my readers 🙂


Humble Pi

I’ve been using a breadboard on top of my Raspberry Pi for a while now to connect components to the GPIO ports.

Pros:

  • Easy to test
  • Easy to make changes
  • Easy to reset individual components by removing their power supply
  • Not “set in stone”

Cons:

  • Fragile, jump cables can be easily disconnected
  • Not secure, cables, resistors and other components could be pushed against each other, creating short-circuits
  • Not aesthetically pleasing

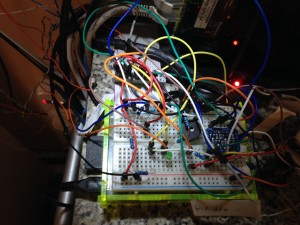
The not aesthetically pleasing is probably best described by a picture:

Breadboard On Pi

Breadboard On Pi

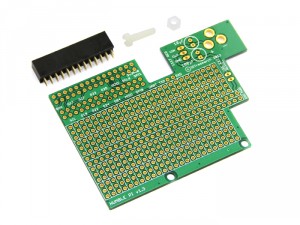
I’ve decided it was time for me to become confident and stop the try and error approach. I’ve not changed the setup / layout in months now and use many components integrally as part of my home automation system like PIRs to control lighing. I’ve therefore purchased a Humble Pi from HobbyTronics to make everything a little bit less like work in progress in the lab:

Humble Pi Stage 1

Humble Pi Stage 1

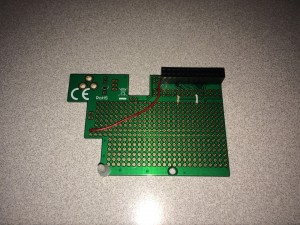
the board came as a kit with all parts separated. I’ve already soldered the header socket and made minor, direct connections to some of the GPIO pins in preparation to the upcoming components:

Humble Pi Stage 2

Humble Pi Stage 2

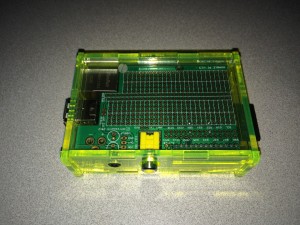
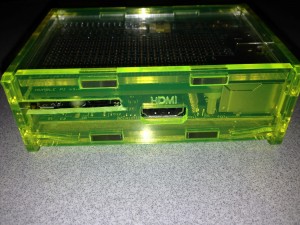
And I’ve checked that it fits in the case. Actually looks pretty cool. Will have to decide how to get the wires to get through though

Humble Pi Stage 3

Humble Pi Stage 3

The other thing I’d like to do is to ensure I can keep the drop cover on to protect the Pi against accidental damages, but I still need all my sensor wires to get in. I’ve therefore sawn a slot off to allow for this:

Pi Case with additional slot

Pi Case with additional slot

Now I need to complete the soldering of all the components. I’ll post a picture when I’ve finished.

[3rd December 2014]

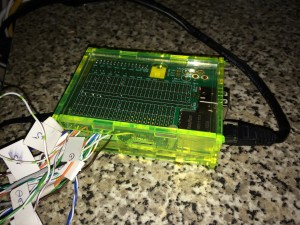
I’ve finally done it! No more messy breadboard, it’s all nice and tidy now 🙂

Humble Pi Completed

Humble Pi Completed


Smart(er) Dehumidifier

So my dehumidifier is already somewhat smart: by using a Cresta TS34C Wireless Temperature & Humidity Sensor, and a HomeEasy Remote Controlled Socket, I can automatically switch the dehumidifier on when the humidity is too high.

Trouble is I’m getting lazy and simply rely on this automation and as a result I tend to forget that the dehumidifier tank will eventually fill up and then stop.

So taking it a step further, I’ve added a home-made Individual Appliance Monitor (IAM) with a spare Current Cost sensor which I plugged between the HomeEasy socket and the dehumidifier.  Check this post for how to make the sensor (same principle as for the Owl one).

Now with a simple event in DomotiGa, if the HomeEasy Socket is on but the power consumption is 0, it means the tank is full and an email is automatically sent.

Isn’t automated life beautiful? 🙂