Author Archives: lolouk44

Wireless Temperature & Humidity Sensor

During the winter months, I tend to use a dehumidifier, with a timer.

I recently “upgraded” the timer and replaced it with one of my HomeEasy Sockets, controlled remotely via DomotiGa.

However I was looking to take it to the next level by making the dehumidifier a bit smarter so it would only work when the relative humidity is too high.

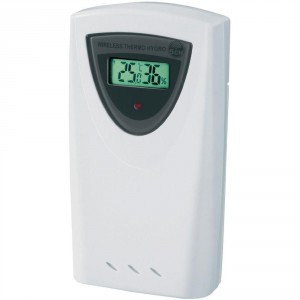
I’ve therefore purchased a Cresta TS34C Wireless Thermo-Hygro Sensor (From HERE):

Cresta TS34C Wireless Thermo-Hygro Sensor

Cresta TS34C Wireless Thermo-Hygro Sensor

The data is received wirelessly via my RFXTrx433

I am currently logging the temperature and humidity levels in order to set Start and Stop times via DomotiGa. Looks to become as follows:

On: RH > 70%
Off: RH < 50%

This will also be done only within specific times during the day so I don’t get awaken at night by the dehumidifier of course.

And because there are 5 channels on the sensor, I can use more than 1 concurrently, so I have another sensor outside to replace the old DHT22 which is starting to show signs of age. It’s also placed in a better location as the sensor is wireless so the readings should be more accurate.

Sound & Text-To-Speech

I was looking to add sound to my DomotiGa installation so I could generate audio alerts and updates.
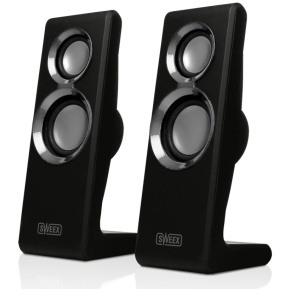
Since my server does not have any audio out socket, I’ve purchased some USB Speakers: Sweex 2.0 Speaker Set Purephonic USB Speakers:

Sweex 2.0 Speaker Set Purephonic USB Speakers

Sweex 2.0 Speaker Set Purephonic USB Speakers

There was only 1 glitch which took me a whole afternoon to sort. For some reason my user was not part of the audio group so I could not get any sound out.

I eventually realised this and sorted it with this command:

sudo adduser [user] audio

And to control the volume, I use this command:

amixer sset Master 50%


I have then recorded a few voice announcements using TTS (Text-To-Speech) that I can use with events such as:

  • “Alert: Front CCTV connection Lost”
  • “Alert: CurrentCost connection lost”
  • “Mood Scene: Movies, Activated”
  • and the geeky “Good Morning” 😎


Dimmable LEDs

The first LEDs I got to replace running expensive halogens were not the best. Although they were really bright (520 lumen) their angle was only about 30º and they didn’t dim that much. So it resulted in a darker room than with the old halogens (which were less bright at 400 lumen)

I got new sets of LEDs. This time I spent much attention to getting ones with a wide beam angle. One thing to note: even though they dim much more than the first ones I got, they still don’t dim all the way down to off like halogens would, probably down to about 30-40%. (They work also very well with the LightWaveRF switches that I use to control them)

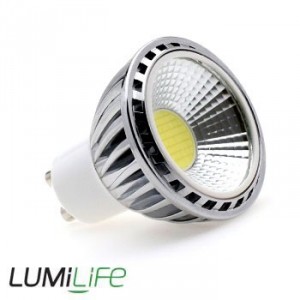
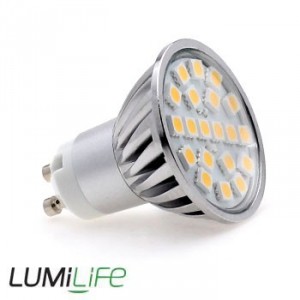
I chose 4.5 Watt GU10 COB Bulb – Wide Beam Angle for the living room:

4.5 Watt GU10 COB Bulb - Wide Beam Angle

4.5 Watt GU10 COB Bulb – Wide Beam Angle

and 4 Watt GU10 LED Bulb – Wide Beam Angle for the kitchen:

4 Watt GU10 LED Bulb - Wide Beam Angle

4 Watt GU10 LED Bulb – Wide Beam Angle

Not only these are much cheaper to run than halogens (less than a 1/10), but because of their wide angle, they end up being actually much brighter too, even the kitchen ones which are only on 320 lumen (VS. 400 lumen for halogens). RESULT !


Charts

I’ve been collecting data from my different sensors:

  • Power consumption & kitchen room temperature from CurrentCost
  • Outdoor temperature & humidity via a DHT22 sensor connected to my Raspberry Pi
  • Server hard drive temperature via HDDTemp

Logging data is good but if you can’t look at it what’s the point?

I’ve therefore implemented charts on my SmartVISU page. This is achieved by using the adapted DomotiCharts script off the original Highcharts plugin.

The result is a nice chart that integrates really well with the look and feel of SmartVISU:

Temperature chart

Temperature chart


SmartVISU

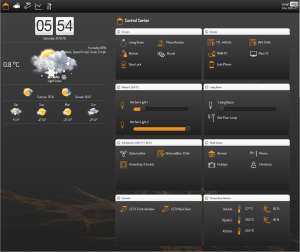
With the recent additions of the RFXtrx, the LightWaveRF switches, the HomeEasy Remote Controlled sockets and the CurrentCost energy monitor, I have updated SmartVISU to take full advantage of these devices.

I’ve also updated the original template to use “my own” weather satellite images (as opposed to the original German ones):

And I’ve added a quick link to view my CCTV Camera feeds in real time.

To see the end result, click on the below pictures.

SmartVISU Control Center (Jan 2015)

SmartVISU Control Center (Jan 2015)

SmartVISU Weather Center

SmartVISU Weather Center

SmartVISU CCTV Stream

SmartVISU CCTV Stream


Server Upgrade

Having quickly realised that my Raspberry Pi was not powerful enough to run all the things I wanted (this wordpress blog, checking the multiple sensors connected to the GPIO ports and displaying their status on a php page), I used an old spare HP Compaq D530u desktop computer as my “server”:

HP Compaq D530u

HP Compaq D530u

Although it’s been running fine for a while, since the addition of DomotiGa, and due to its old age (and probably dust) it’s not really up to the task anymore (it did crash a few times due to overheating etc). I’ve therefore decided to upgrade my gear to something that’s closer to a real server than a desktop computer.

I’ve purchased a brand spanking new HP Proliant G7 N54L server:

HP Proliant G7 N54L

HP Proliant G7 N54L


I’ve now installed Ubuntu Server x64 on it and transferred all applications, MySQL databases, files, etc.

It comes with a 250GB SATA hard-drive which is much better than the 40GB PATA one I had before, and I still have space for another 3 (when I decide to use it as a NAS too).

Not only it is quicker than the old HP Compaq D530u, it’s much quieter too 🙂

I did have to change from tightvncserver to vnc4server. Tightvncserver would crash within 30 min or so and the only option would end up connecting via SSH to attempt to kill and restart the service. Since the installation of the alternative vnc4server, I’ve not experienced a single crash 😎


LightWaveRF Switches

OK I can make the buzzer beep if I forget the lights at night (see code from this post).

But that’s a little bit reactive, and still requires me to “move” and manually switch the light off. What would be better would be to switch the lights off altogether without requiring me to lift a finger.

This is where LightWaveRF comes into play. Not only they look really sleek, they fit in a standard connection box and are relatively cheap (when comparing with other standards).

I therefore bought a couple: 1 x 1 gang for the living room, 1 x 2 gang for the kitchen:

LightWaveRF 1 Gang Switch

LightWaveRF 1 Gang Switch

LightWaveRF 2 Gang Switch

LightWaveRF 2 Gang Switch

The way I chose to control them is to pair them with an RFXtrx transceiver via DomotiGa (see this post for more info).

I’ve still got to install the kitchen switch, but for now, I can control the living room lights from anywhere in the world !

LightWaveRF Switch via SmartVISU

LightWaveRF Switch via SmartVISU

I’ve also got some dimmable LEDs, but it turns out I can only dim them down to 50% instead of 0% (not much difference to be honest) so I might be looking for better ones soon. Watch this space 🙂


HomeEasy Remote Controlled Sockets

Next step in my Home Automation setup: remote controlled sockets.

I’ve therefore purchased a set of HomeEasy HE830s Remote Controlled Sockets (from Screwfix for those interested):

HomeEasy HE830s Remote Controlled Sockets

HomeEasy HE830s Remote Controlled Sockets

The first step is to get it working with the supplied remote. They’re fairly easy to pair (hold the button on the socket for 2 sec, then press the desired On button on the remote).

For the next step, since the HomeEasy sockets use a “standard” 433MHz frequency, they can be controlled by the RFXCom RFXtrx that I also purchased.

See this post for more information on what the RFXtrx is and how to pair a HomeEasy device with it.

The nice thing with the HomeEasy remote is that I can either pair it with a socket, or pair it with the RFXtrx to perform custom action within DomotiGa, or both.

For example I have set a Cinema mood scene: it dimms the living room lights, switches off the lights in the kitchen and switches on a floor standing light at the press of a single button 🙂


RFXCom RFXtrx Transceiver

Now that I have DomotiGa installed, I realise the potential for a much better home automation / smart home. I manage to convince the “boss” to agree to get some goodies, namely LightWaveRF smart light switches (see this post) and a RFXCom RFXtrx Transceiver (from HERE) to control them remotely from DomotiGa.

RFXCom RFXtrx Transceiver

RFXCom RFXtrx Transceiver

I specifically chose the RFXCom RFXtrx Transceiver instead of the LightWaveRF WiFi Link as it can control many other 433MHz based devices. The WiFi Link only controls LightWaveRF devices and is limited to 6 devices per room, 48 total devices (I’m not even sure if the RFXtrx has any such limitation).

To setup the RFXtrx in DomotiGa and pair it with a LightWaveRF Switch, this is what I did (under Ubuntu / DomotiGa):

  1. Connect the RFX
  2. run lsusb to make sure it’s correctly recognised
  3. Start DomogiGa
  4. Enable RFX Transceiver under Interfaces > RXFCom > Transceiver RFXTrx (note mine was listed under /dev/ttyUSB1, all other options left as default)

    RFXCom Setup

    RFXCom Setup

  5. Launch RFXCom Commander under Tools
  6. Make sure it shows Connected in green

    RFXCom Commander - Connected

    RFXCom Commander – Connected

  7. Go to Receiver and ensure AD/LightwaveRF is enabled

    RFXCom Commander - Modes selection

    RFXCom Commander – Modes selection

  8. Go to Lightning5 tab
  9. Select LightwaveRF for Type, select any ID (just remember what it is)

    RFXCom Commander - LightWaveRF

    RFXCom Commander – LightWaveRF

  10. On the switch, hold both On and Off buttons for ~2 sec until both amber and blue lights flash
  11. Quickly click on On to pair
  12. You can check it paired correctly by sending Off and On commands.
  13. Now you can add it as a Device, the address to enter for the dimmer switch in DomotiGa is in the form ” abcdef 1 “, being the 6 digit ID + the Unit Code. (in my example ” 010102 1 “)


CurrentCost Energy Monitor

I received a free energy monitor a few years ago.

CurrentCost Classic

CurrentCost Classic

At the time I did notice the socket underneath, but never got round to getting a cable and software to take full advantage of its use.

After the initial novelty (seeing on a screen how much energy I was using), I ended up putting it in a cupboard.

However since I started using DomotiGa for my home automation setup, and since it appeared to be supported, I started to think about it again. I eventually sourced a cable (HERE)

CurrentCost USB Cable

CurrentCost USB Cable

The setup with DomotiGa was fairly painless: after enabling the CurrentCost energy monitor option and selecting the correct ttyUSB, the data was captured, namely current consumption, max consumption and temperature.

I added this straight away to my SmartVISU page 🙂 :

CurrentCost data in SmartVISU

CurrentCost data in SmartVISU