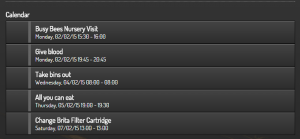
On 17th November 2014, Google closed its V1 and V2 APIs:
“The Google Calendar API moved to version 3 months ago; however, many developers have continued to hang on to v1 and v2 integrations. In less than a month, on Nov. 17, Google will shut down v1 and v2 in accordance with itsDeprecation Policy. Google has published an entire Migration Guide to assist developers’ transition, and many third-party solution providers have released packages to further streamline the process.”
This meant that the Calendar widget on SmartVISU was no longer working.
CarGo kindly created a guide on how to create a V3 API so the calendar would work with SmartVISU.
Trouble is, CarGo wrote it in German, so I’ve translated it below. It may sound complicated, but then it’s only required once 🙂
- Log in to the Google Developer console: https://console.developers.google.com
- Create a “Project” -> You can simply enter “Project API”, unless you’re planning on creating many APIs / Apps, it does not matter at this stage
- On the left menu, select “APIs” then “Calendar API” on the main page.
- On the left menu, select “Credentials” then click on “Create new Client ID”
- Important: Select “Installed applications”, NOT Web Application – otherwise you’ll have to grant access each time in a pop-up…
- On the left menu, select “Consent screen”. The main info to provide here is the Product Name. I called mine SmartVISU.
- Select “Installed Application” then “Other” for application type, and finally “Create Client ID” .
- Now under “Credentials” from the left menu, “Client ID”, “Client Secret” and “Redirect URIs” are displayed. We’ll need these in the next steps
The access details are now configured. The trick is to create an “Authorization Code” and “Refresh token”.
To do so, download Google_Calendar_SmartVISU.zip and extract it in “[path]/smartvisu/lib/calendar/service”. (Replace [path] with the path to access your SmartVISU folder)
Make sure the file owner is www-data else you’ll get errors. To make www-data the owner, simply enter the below in a terminal:
chown www-data [path]/smartvisu/lib/calendar/service/google*
- Getting the “Authorization Code” and “Refresh token”:
- Enter the values for “ClientID” and “redirect URI” in “google_1.php”
- Paste the below command in the terminal
-
php -q google_1.php
- Click on the link in the terminal (you may need to hold CTRL while you click)
- Confirm you want to grant access to your Google Account
- Copy the “Authorisation Code” displayed
- Enter the values for “ClientID”, “Client Secret”, “redirect URI” and the code copied from above step in “google_2.php”
- Paste the below command in the terminal
-
php -q google_2.php
- Keep note of the provided “Refresh Token”.
- Edit “googleV3.php” and replace the blanks for:
- “ClientID”
- “Client Secret”
- “Redirect URI”
- “Refresh Token”
Last but not least, edit config.php in your main SmartVISU folder and add replace your google calendar line with the new script:
define('config_calendar_service', 'googleV3');
Save, Et Voilà !
Massive thanks to CarGo for the original work and guide.
PS. There may be a need to refresh the token in the future. I’ll post an update as and when it occurs. If this happens, Ideally the refresh should be automated, but that’s a story for another time 😉

